

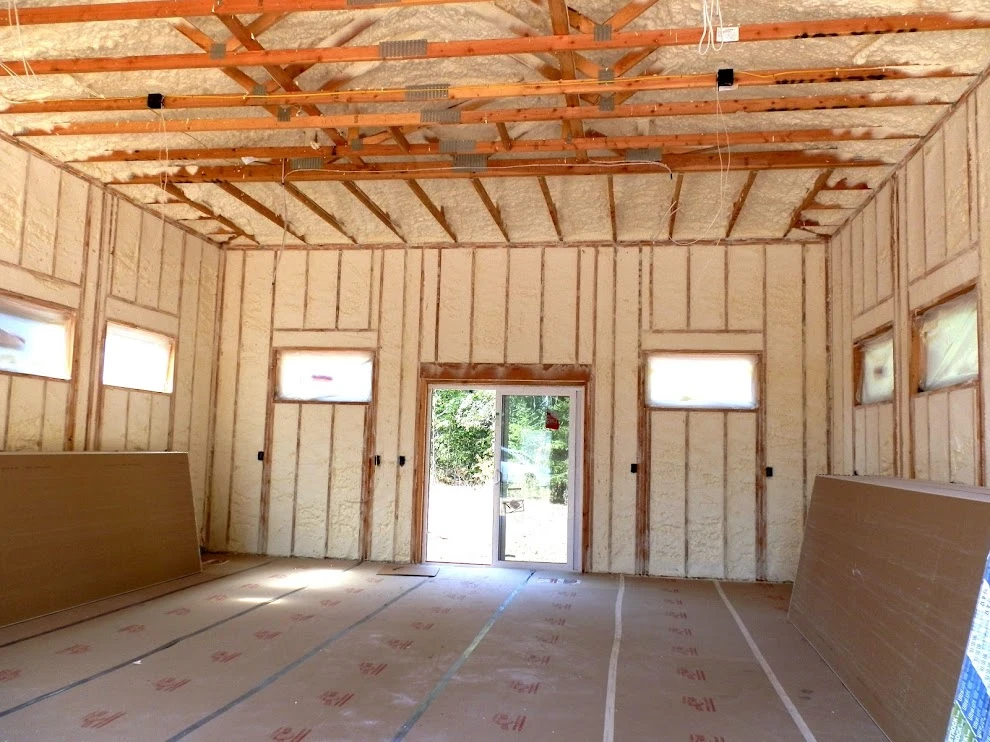
Every house has that one room. The upstairs bedroom that bakes in July. The floor that stays cold no matter where you set the thermostat. The furnace and air conditioner that never seem to catch up. Most people blame the insulation, but in the homes we inspect, the bigger problem is usually air leaking straight through it. Insulation slows heat, yet standard batts and blown-in products do almost nothing to stop air movement. Open-cell spray foam insulation solves both problems in one step because it insulates and air-seals at the same time.
We have spent years spraying this material in attics, wall cavities, and ceilings across Southwest Washington and the Portland metro area. Along the way we have learned what the spec sheets leave out: how the foam behaves on a cold roof deck, where it should never be installed, and how to tell a properly mixed pass from a bad one. This guide pulls all of that into one place.
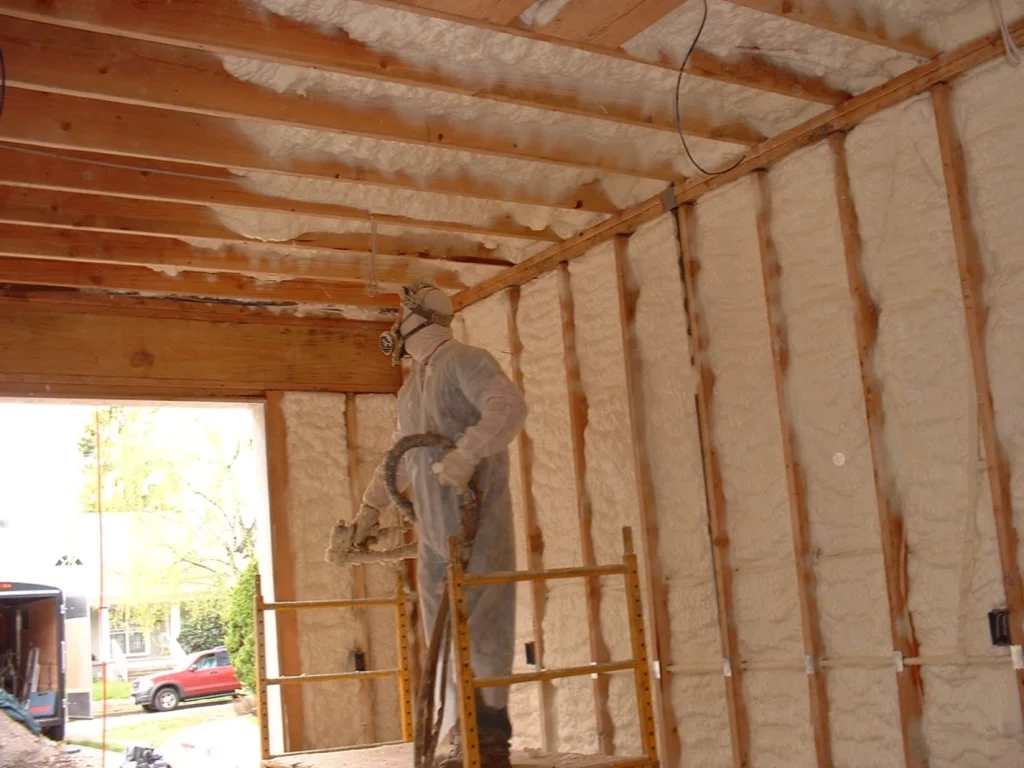
Open-cell spray polyurethane foam starts as two liquids. One drum holds a polymeric MDI resin. The other holds a polyol blend mixed with surfactants, catalysts, and fire retardants. A heated hose feeds both liquids to a spray gun, where they combine and react. The mixture expands to as much as 150 times its liquid volume as water in the formula releases carbon dioxide, inflating the foam the way yeast inflates bread dough.
That expansion is the whole point. The foam pushes into gaps, cracks, and awkward corners that batts can never reach, then cures into a soft, lightweight solid. Because the cells burst open during the reaction, the finished material is full of connected air pockets. That is why it is called open-cell, and why it weighs about 0.5 pounds per cubic foot, roughly half the density of its closed-cell cousin.
The U.S. Department of Energy’s Building America program publishes a technical guide that sums up the material’s typical properties, and the numbers below come straight from that document.
| Property | Typical Value for Open-Cell Foam |
|---|---|
| Density | 0.5 lb per cubic foot |
| R-value per inch | about R-3.6 (aged) |
| Expansion | up to 150x liquid volume |
| Application | full thickness in a single pass, up to about 10 inches |
| Vapor permeance | roughly 10 perms at 5 inches thick |
| Flame spread / smoke developed (ASTM E84) | less than 25 / less than 450 |
| Sound performance in a 2×4 wall | STC 37, NRC 70 |
One more thing worth knowing before we go deeper: open-cell foam is an excellent air blocker but not a vapor blocker. It stops wind-driven airflow through a wall, yet water vapor can still pass through and dry out. That single trait drives most of the dos and don’ts later in this guide.
R-value measures how well a material resists heat flow. Higher numbers mean slower heat loss in winter and slower heat gain in summer. Open-cell foam delivers roughly R-3.6 per inch, so a filled 2×6 cavity, 5.5 inches deep, lands close to R-20.
That per-inch number is lower than closed-cell foam’s, and it is the figure sales literature loves to compare. But the comparison misses two points.
First, the published value is already aged. Open-cell foam is air-filled, so its R-value is stable over time. It does not slowly lose performance the way older closed-cell formulas did as their insulating gas drifted out of the cells.
Second, R-value only tells you how the material performs in a perfect lab cavity. In a real wall, fiberglass and cellulose lose effective R-value to air that washes through them and to cold spots at every seam and staple. Foam fills the cavity edge to edge, so the R-value you buy is much closer to the R-value you get. A U.S. Department of Energy guide notes that a 5.5-inch open-cell wall cavity delivers about R-20, and that the foam’s air-sealing ability is what makes its real-world performance stand out.
So how much R-value should you target? ENERGY STAR’s insulation guide, based on the 2021 International Energy Conservation Code, recommends these levels for retrofitting existing wood-framed homes:
| Location | Climate Zone (example) | Recommended R-Value |
|---|---|---|
| Attic, currently uninsulated | Zone 1 (hot) to Zones 7-8 (very cold) | R-30 up to R-60 |
| Attic, already has 3-4 inches | All zones | R-25 to R-49 more |
| Floors over unconditioned space | By zone | R-13 to R-38 |
| Walls above grade | Zones 4-8 | Add R-5 to R-10 continuous sheathing when re-siding |
Our home territory around Vancouver, WA and Portland sits in the marine climate zone, where attic targets run R-49 to R-60 if you insulate at the ceiling. When we insulate at the roof deck instead, which turns the attic into conditioned space, the roof assembly usually needs less total R to hit code, and the attic becomes usable storage or mechanical space.
One honest caveat: open-cell foam’s R-value dips somewhat as the material gets very cold, more than closed-cell foam does, because plain air fills the cells. In wall cavities and conditioned attics this is a minor effect, but it is one more reason not to judge a foam by a single per-inch number.
Key Takeaways
Thickness is where good projects and bad projects diverge. Spray too little and you miss your R-value. Spray recklessly thick and you waste material and risk heat damage inside the mass of curing foam.
Open-cell foam has a genuine advantage here: it can go on at full thickness in a single pass, up to about 10 inches, because its open structure releases reaction heat easily. Closed-cell foam, by contrast, must be built up in 2 to 3 inch layers. On a big attic job, that difference cuts install time dramatically.
Here is how thickness maps to common applications:
| Application | Typical Thickness | Approx. R-Value | Notes |
|---|---|---|---|
| 2×4 wall cavity | 3.5 inches | R-13 | Fills cavity completely |
| 2×6 wall cavity | 5.5 inches | R-20 | The most common open-cell application |
| Cathedral ceiling / roof deck | 5.5 to 10 inches | R-20 to R-36 | Max thickness varies by product’s code evaluation report |
| Floor over unconditioned space | Full cavity depth | R-13 to R-26 | Leave no gaps at the top of the bay |
| Rim and band joists | Full bay | Varies | Small area, large air-sealing payoff |
A few practical rules shape these numbers. For unvented attics and cathedral ceilings, model codes recognize open-cell foam applied directly to the underside of the roof deck because it counts as air-impermeable insulation. But each manufacturer’s evaluation report sets a maximum approved thickness for that specific product, and the Department of Energy guide puts that range at 5.5 to 10 inches depending on the product. We always match the design to the report before the first drop of foam is mixed, because the inspector on your job will.
Also worth knowing: a thin, dribbly pass does not air-seal. The foam needs enough thickness and coverage to form a continuous layer before it can be considered an air barrier.
Expert Tip: Before any full wall or ceiling gets sprayed, ask the crew to do a small test patch and measure it with a depth gauge once it cures. It takes five minutes, and it catches mix problems while they are still cheap to fix.
Judging spray foam on R-value alone is like judging a truck on paint color. Its biggest wins come from the other three performance traits.
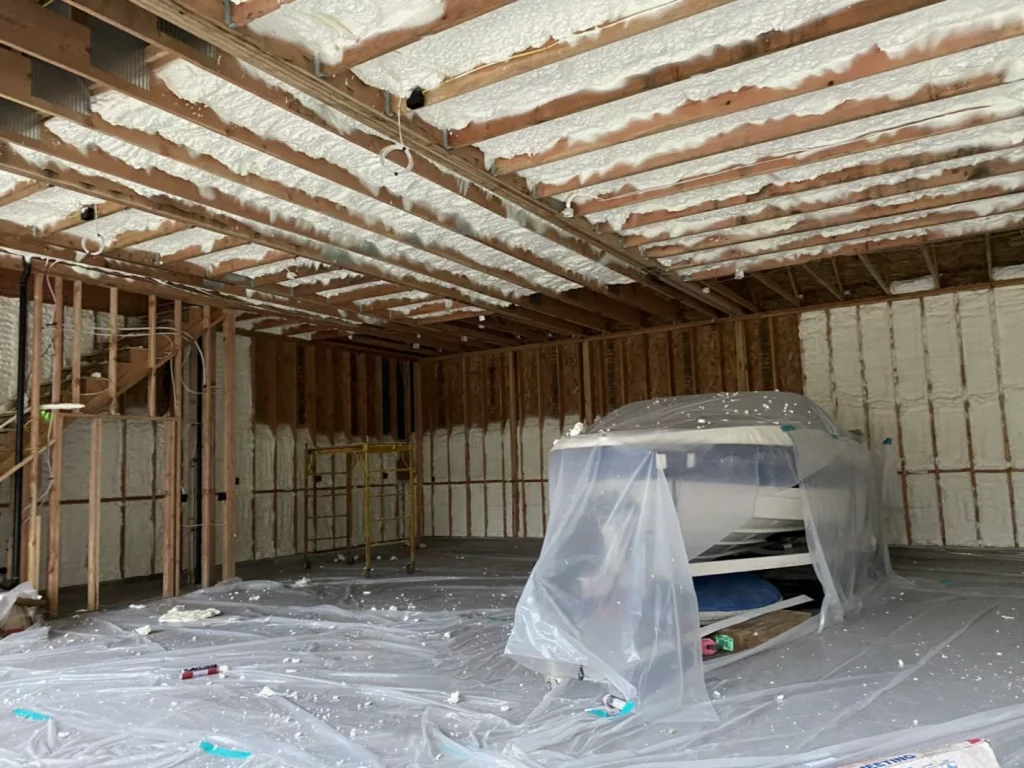
Air sealing. Air that leaks through a home’s envelope wastes energy and drives up utility bills, and ENERGY STAR estimates that the combined leaks in a typical house add up to something like a window standing open all year. Foam stops that flow at the insulation plane itself. Every wire penetration, plumbing chase, and framing joint gets encapsulated as the foam expands. This is also why foam excels in attics: the ceiling plane is where warm air wants to escape all winter.
Sound. Open-cell foam is soft and full of air pockets, which makes it a natural sound absorber. In the DOE-cited lab testing of a standard 2×4 wood stud wall, the assembly reached an STC of 37 and an NRC of 70, enough to noticeably hush traffic, home theaters, and plumbing runs. We spray interior partition walls for exactly this reason.
Moisture. Here is where you need nuance. Open-cell foam is vapor-open, about 10 perms at 5 inches, so a wall or roof insulated with it can dry toward the interior. That is a durability feature in most assemblies, but it cuts both ways. The same DOE guide warns that open-cell foam can absorb and hold a large amount of liquid water, up to roughly a third of its volume, if it is exposed to bulk water from a roof or plumbing leak. The foam itself dries out if given a path, but the leak still needs fixing fast, and wet foam can hide the leak’s location on a roof. In cold climates, assemblies need a vapor retarder at the interior finish, such as vapor-retarder primer or standard painted drywall, paired with an exterior that can breathe.
Expert Tip: If your roof is due for replacement within a few years, deal with the roof first. Spraying a roof deck that you will be tearing shingles off next summer invites trouble you do not want.
This is the single most common question homeowners ask us, and the honest answer is that neither foam wins everywhere. Each has a job it does better.
| Feature | Open-Cell | Closed-Cell |
|---|---|---|
| Density | 0.5 lb per cubic foot | About 2 lb per cubic foot |
| R-value per inch | About R-3.6 | About R-6 to R-7 |
| Expansion | Up to 150x | 35 to 50x |
| Application | Up to 10 inches in one pass | 2 to 3 inches per pass, layered |
| Vapor behavior | Vapor-open, dries to the interior | Vapor retarder or impermeable |
| Water | Can absorb, then dry | Sheds water |
| Rigidity | Soft, flexible | Rigid, adds some racking strength |
| Where it shines | Walls, roof decks, sound control, budget-driven whole-home work | Basements, crawl spaces, ductwork in attics, thin assemblies, flood-prone areas |
| Typical board-foot price (our rates) | $0.28 to $0.75, average $0.32 | $1.20 to $3.00, average $1.50 |
The price gap is real but smaller than it looks once you account for thickness. You need roughly half again as many inches of open-cell to hit a given R-value, but each inch costs far less, and closed-cell’s per-pass thickness limits stretch install schedules on big jobs.
As a rule of thumb from the field: choose open-cell when you want maximum coverage in standard framing, conditioned attics, or sound control. Choose closed-cell for anything below grade, for thin spaces that need high R, and for assemblies that must block vapor. And sometimes the right answer is both, a hybrid with closed-cell where moisture threatens and open-cell everywhere else.
Spray foam is sold by the board foot, which is a 12-inch by 12-inch area at 1 inch thick. Multiply wall or ceiling area by depth in inches and you have your board-foot count. Our open-cell pricing runs $0.28 per board foot on large, easy-access jobs, $0.32 on a typical project, and up to $0.75 on small or difficult ones.
Here is what the math looks like on real assemblies at the average rate:
| Application | Cost per Square Foot | Example Project | Estimated Total |
|---|---|---|---|
| 2×6 wall, 5.5 inches | about $1.76 | 1,200 sq ft of exterior wall | about $2,100 |
| Roof deck, 8 inches | about $2.56 | 1,400 sq ft of attic roof deck | about $3,600 |
| 2×4 wall, 3.5 inches | about $1.12 | 800 sq ft of interior sound wall | about $900 |
Three factors move your number more than anything else:
When you compare quotes, insist that every bidder price the same thing: the same board-foot count at the same thickness. A quote that says “spray the attic” without inches and board feet is not a quote, it is a guess.
Expert Tip: Get the board-foot math written on the proposal. It makes bids directly comparable, and it protects you if the crew starts cutting corners by under-spraying.
Foam quality is made or lost before the gun ever fires. Here is the sequence on a typical job of ours.
Most residential jobs wrap in one to three days depending on square footage and how much masking the site needs.
Expert Tip: Schedule foam work for a dry weather window when the building can be opened up afterward. Fresh airflow for the first days after installation shortens the cure and clears the mild new-foam smell faster.
Spray foam is safe and inert once it cures properly, and the differences between a good install and a bad one are worth understanding in plain terms.
Curing and re-entry. Foam is tack-free within minutes, but full curing takes longer, which is why occupants stay out during application and until the work area has been ventilated per the manufacturer’s spray foam guidance. Emissions during and after application vary with chemistry, temperature, airflow, and how well the product was mixed. A National Institute of Standards and Technology study done for the Consumer Product Safety Commission found measurable flame-retardant emissions in one test home even two years after an open-cell application, which points to a foam that may have been applied off-ratio. The lesson is not that cured foam is dangerous. It is that installation quality is a health issue, so hire crews who log their material ratios and honor re-entry times, and call your installer if a chemical odor persists instead of fading over the first days.
Fire performance. All spray polyurethane foam is combustible, and formulations include fire retardants to keep surface burning characteristics low, typically under 25 flame spread and under 450 smoke developed on the ASTM E84 test. Because the foam itself is a fuel, codes require protecting it.
Thermal and ignition barriers. In occupied living space, foam must sit behind a 15-minute thermal barrier, which in practice means standard 1/2-inch drywall. In attics and crawl spaces that are entered only for service, not storage, a lighter ignition barrier may be allowed instead, with the specifics set by each product’s evaluation report. If a contractor tells you exposed foam in your living room is fine because “it’s rated,” walk away.
Key Takeaways
After enough callbacks and tear-outs, you learn the failure patterns. Here are the big ones and how we prevent them.
Off-ratio foam. If the two chemicals are out of balance, foam stays soft and sticky or turns brittle and crumbly, and it can smell. Prevention: crews who run ratio checks and do test patches, and who stop the moment a pass looks wrong.
Shrinkage and cracking. Foam applied too thick in one area, onto a cold or damp surface, or without proper substrate prep can pull away from framing as it cures. Prevention: dry substrates, correct surface temperatures, and lifts that respect the product’s limits.
Voids and thin spots. Foam that bridges across a cavity without filling it defeats the air barrier. Prevention: a methodical pass pattern and an inspection walk before drywall, not after.
Missed thermal barriers. Exposed foam in a garage ceiling or basement is a code violation waiting for an inspection. Prevention: plan the cover material into the project from day one.
Wrong product, wrong place. Open-cell foam does not belong below grade, where soil moisture can saturate it, and it is a poor choice behind brick veneer or over cooling ducts buried in attic insulation, where the DOE guide lists it as not acceptable. Prevention: a contractor who says no sometimes.
The point of all this is a house that costs less to run and feels better to live in. The numbers back it up.
EPA estimates cited by ENERGY STAR put the average savings from air sealing plus adding insulation at 15% on heating and cooling costs, or about 11% on total energy bills. The agency also reports that 9 out of 10 homes in the U.S. are under-insulated, which means most houses have real headroom for improvement.
Savings vary by climate. In the EPA’s modeled estimates for cost-effective sealing and insulation upgrades, homes in our marine climate zone come in among the stronger performers, with heating and cooling savings modeled as high as 20%, while the national average sits at 15%. Foam does especially well against those models because it delivers the air-sealing and the insulation upgrade in one pass.
Beyond the bills, here is what homeowners actually report: temperatures that match room to room, less dust and pollen drifting in, quieter bedrooms, and fewer ice dams along the eaves in snowy weeks. We verify the air-sealing gain with a blower door test when a project warrants it, which puts a hard number on the leak reduction instead of a promise.
And the value is not only monthly savings. A conditioned attic adds usable storage, foam-insulated walls add resale appeal, and you will never again think about that drafty bonus room.
After all those sections, here is the distilled placement guide we use on estimates.
Open-cell is usually the right call for:
Open-cell is the wrong call for:
Climate matters too. In our marine Northwest climate, open-cell works beautifully with a vapor-retarder paint at the interior and a breathable exterior. In hot-humid Southern climates, the same foam is common at roof decks but must never get an interior vapor retarder, since vapor drives inward there and the assembly needs to dry to the inside. Location changes the details, which is why a cookie-cutter quote should make you suspicious.
Yes, once it has fully cured, which takes days of normal ventilation, the foam is stable and inert. The safety risks concentrate in the application window, so stay out during spraying and follow your installer’s re-entry guidance, and report any persistent chemical odor.
It can absorb water, but it also dries back out when the source is fixed and the assembly has a drying path. Fix leaks quickly, because wet foam can hide a slow leak, and check the affected area for lingering moisture.
No. Two-component foam requires heated proportioning equipment, exact chemical ratios, supplied-air respirators, and knowledge of code barrier requirements. DIY kits exist for tiny air-sealing gaps, but a house’s worth of foam is professional work.
A mild, new-foam odor for the first several days is normal and fades with ventilation. An odor that lingers for weeks or that returns in hot weather points to improperly mixed foam and warrants a call back to your installer.
A fully filled 5.5-inch cavity gives you about R-20, based on roughly R-3.6 per inch, and the cavity is air-sealed at the same time.
Insulating the roof deck with open-cell foam creates a conditioned attic, which protects ductwork and HVAC equipment and adds storage, while insulating the floor keeps the attic vented and usually costs less per R. The right choice depends on your ductwork location, your climate zone, and how you want to use the space.
You now have the full picture: open-cell foam is about R-3.6 per inch, it needs roughly 5.5 inches in a 2×6 wall and 7 to 10 inches on a roof deck, it trades a lower per-inch R-value for airtightness and sound control, and it earns its keep in walls and attics while staying out of wet basements. Its price moves with board feet, thickness, and access, and its long-term safety rests on correct mixing and the required fire barriers.
Use this page as your checklist. Verify thickness against the product’s evaluation report, compare bids in board feet, plan the thermal barrier before the foam flies, and match the material to each assembly instead of forcing one product everywhere. Do that, and open-cell spray foam insulation will be one of the highest-impact upgrades your home ever gets.
If you are weighing open-cell against closed-cell, or you want a real board-foot number for your house, we are happy to help. Spray-On Foam & Coatings serves Battle Ground, Vancouver, WA, the Portland metro area, and the surrounding communities, and we will walk your project with you before we ever quote it. Reach us at [email protected] or (360) 667-1993.